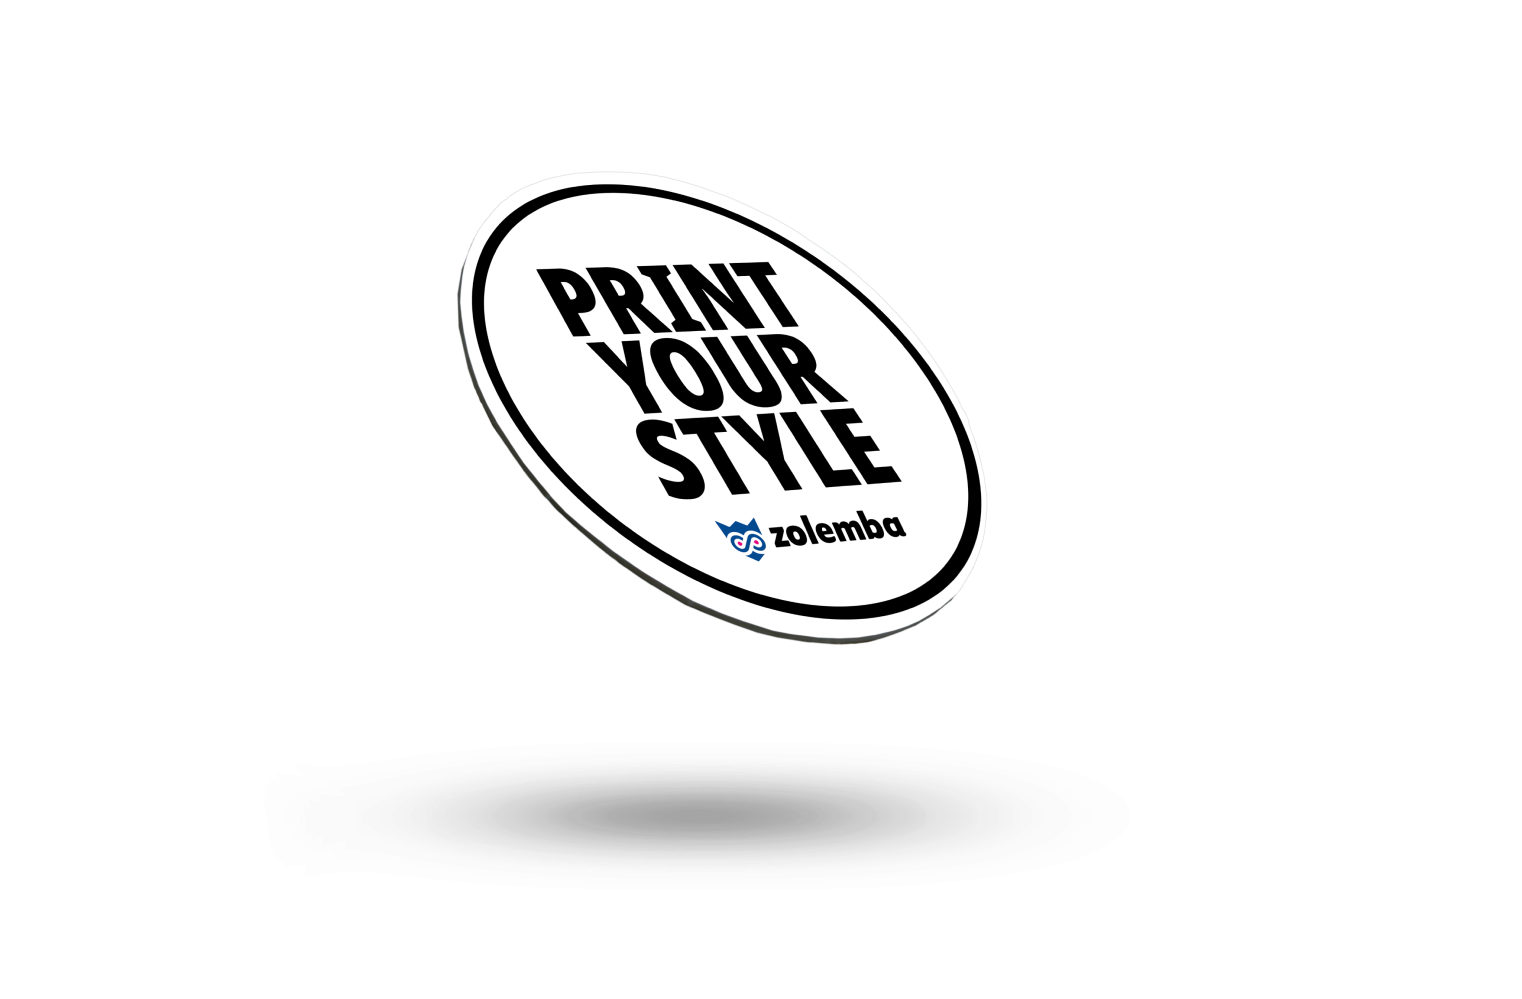
Create a cut line in Illustrator
Cutting printed materials is called die-cutting. With our Jetrion 4900, we can create any
unique shape using laser technology without extra charge!
At Zolemba, the fast laser die-cutting works as follows. After placing your order, you
provide your file by uploading it to our Zolemba site. In this file, your desired shape is
indicated by a die-cut line. We then load the file into our digital press. The specific
die-cut line is loaded into the digital laser station. Then, in one pass, the label is
printed on the same digital press and immediately die-cut using multiple laser beams. Also,
immediately after die-cutting, the waste is removed and the labels are wound onto rolls. We
do not need clichés or die plates, so you do not incur these costs. Thanks to laser
die-cutting, we can ship within 24 hours!
Below, in 8 steps, is explained how to create a die-cut line in Illustrator:
step 1:
Open Illustrator and go to your tools. If this panel is not visible: Go to the menu bar at the top. Click on 'Window'. Hover over 'Tools', expand this option, and select 'Default'.
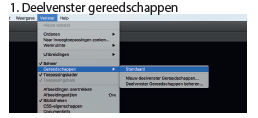
step 2:
Open Illustrator and go to your tools. If this panel is not visible: Go to the menu bar at the top. Click on 'Window'. Hover over 'Tools', expand this option, and choose 'Default'.
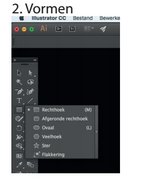
step 3:
Set the fill color to 'None'. If this panel is not visible: go to the menu bar at the top. Click on 'Window'. Click on 'Color'.
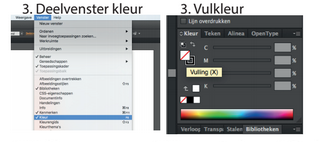
step 4:
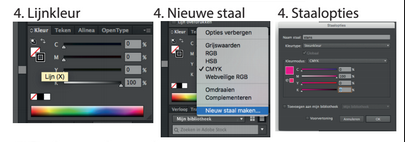
The stroke color must be a spot color named ‘die-cut’. Click on 'Stroke Color'. Click on 'Options' in the 'Color' panel (top right). Click on 'New Swatch'. Adjust the settings as shown in the example.
step 5:
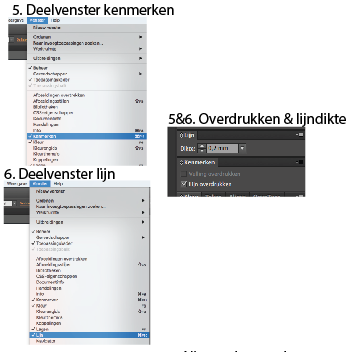
Select 'Overprint Stroke' under Attributes. If this panel is not visible: go to the menu bar at the top. Click on 'Window'. Click on 'Attributes'.
step 6:
Change the stroke width to 0.2mm under 'Stroke'. If this panel is not visible: go to the menu bar at the top. Click on 'Window'. Click on 'Stroke'.
step 7:
Set the fill color to 'None'. If this panel is not visible: go to the menu bar at the top. Click on 'Window'. Click on 'Color'.
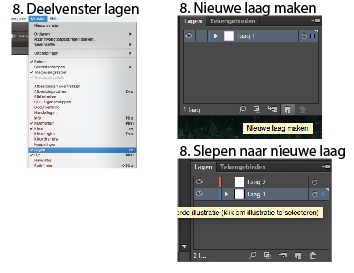
step 8:
The stroke color must be a spot color named ‘die-cut’. Click on 'Stroke Color'. Click on 'Options' in the 'Color' panel (top right). Click on 'New Swatch'. Adjust the settings as shown in the example.
Exclusive Offers and Free Tips!
Stay informed and never miss out on offers, handy tips, or free templates.
Thank you! You have successfully subscribed to our newsletter.